Hello Web3XR
For anyone who is new to Web3XR, this simple project can serve as a helpful entry point to start learning. It combines a very popular Ethereum library, ethers.js, and a popular WebXR framework, A-Frame. Using these as our base, we will create an immersive experience that will display your wallet address/ENS name once you connect to it. All you’ll need for this is a code editor and a terminal. This tutorial also assumes you are using MetaMask as a web wallet.
Creating the A-Frame Scene
To begin, create a folder for your project files, then create an index.html file in that folder. We can start our page off like so:
<!DOCTYPE html>
<html>
  <head>
    <script src="https://aframe.io/releases/1.2.0/aframe.min.js"></script>
    <title>Hello Web3XR</title>
  </head>
  <body>
    <a-scene></a-scene>
  </body>
</html>
This is the most basic A-Frame scene you can create. A-Frame uses a declarative syntax, so several elements can be created and manipulated solely through HTML. The <a-scene> tag is what encapsulates all of your elements into a scene.
To test our scene, we need to spin up a local webserver that will serve this page.
If you have NPM installed, you can navigate to your project folder in your terminal and run the command npx http-server to make your site accessible at http://localhost:8080. Any method here will work, we just need the page to not be served as a file, otherwise A-Frame will not work.
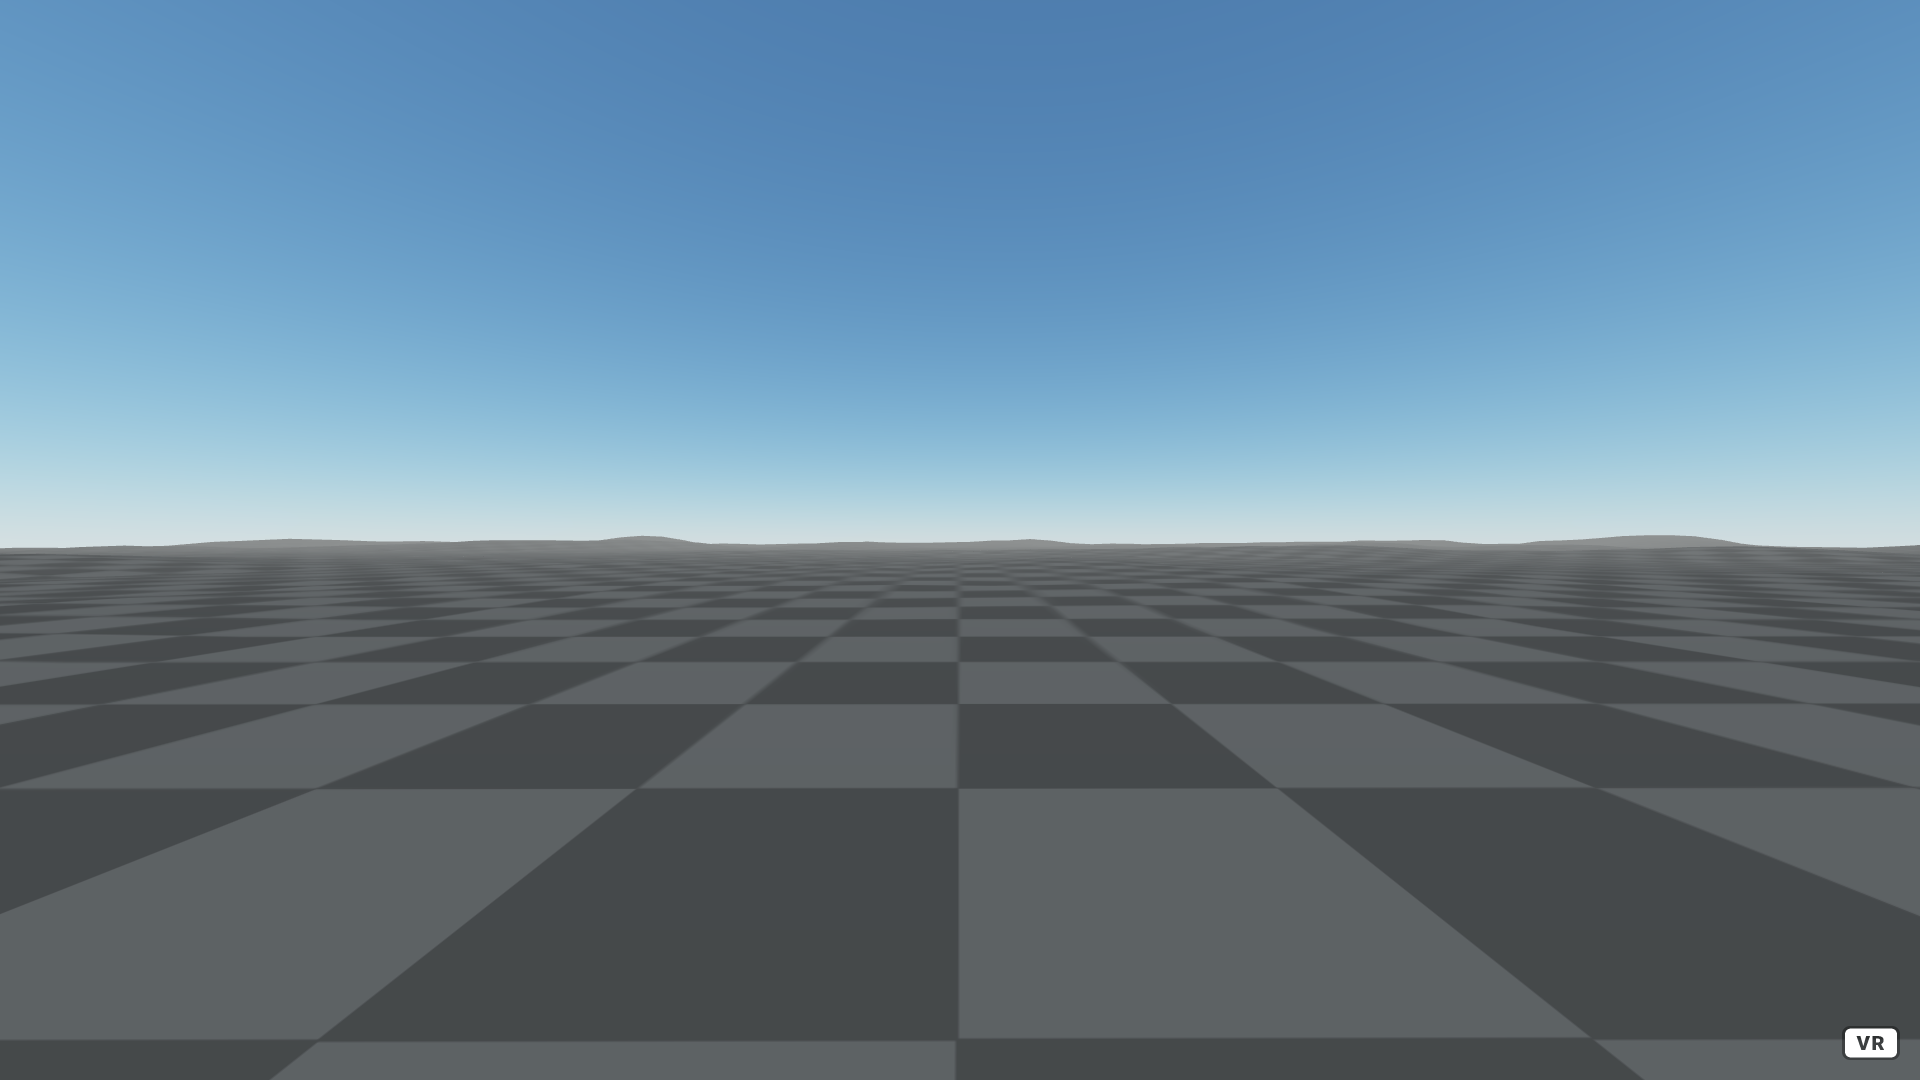
Once that’s done, your page should look like this:
Technically, you could enter your page immersively right now, but there wouldn’t be much to see. To fix this, we’ll use the A-Frame Environment Component, which lets you choose from a variety of procedural backgrounds to quickly add to your scene.
Simply import the script tag and then add it to the A-Frame scene like so:
<!DOCTYPE html>
<html>
  <head>
    <script src="https://aframe.io/releases/1.2.0/aframe.min.js"></script>
    <script src="https://unpkg.com/aframe-environment-component@1.2.0/dist/aframe-environment-component.min.js"></script>
    <title>Hello Web3XR</title>
  </head>
  <body>
    <a-scene>
      <a-entity environment="preset: default"></a-entity>
    </a-scene>
  </body>
</html>
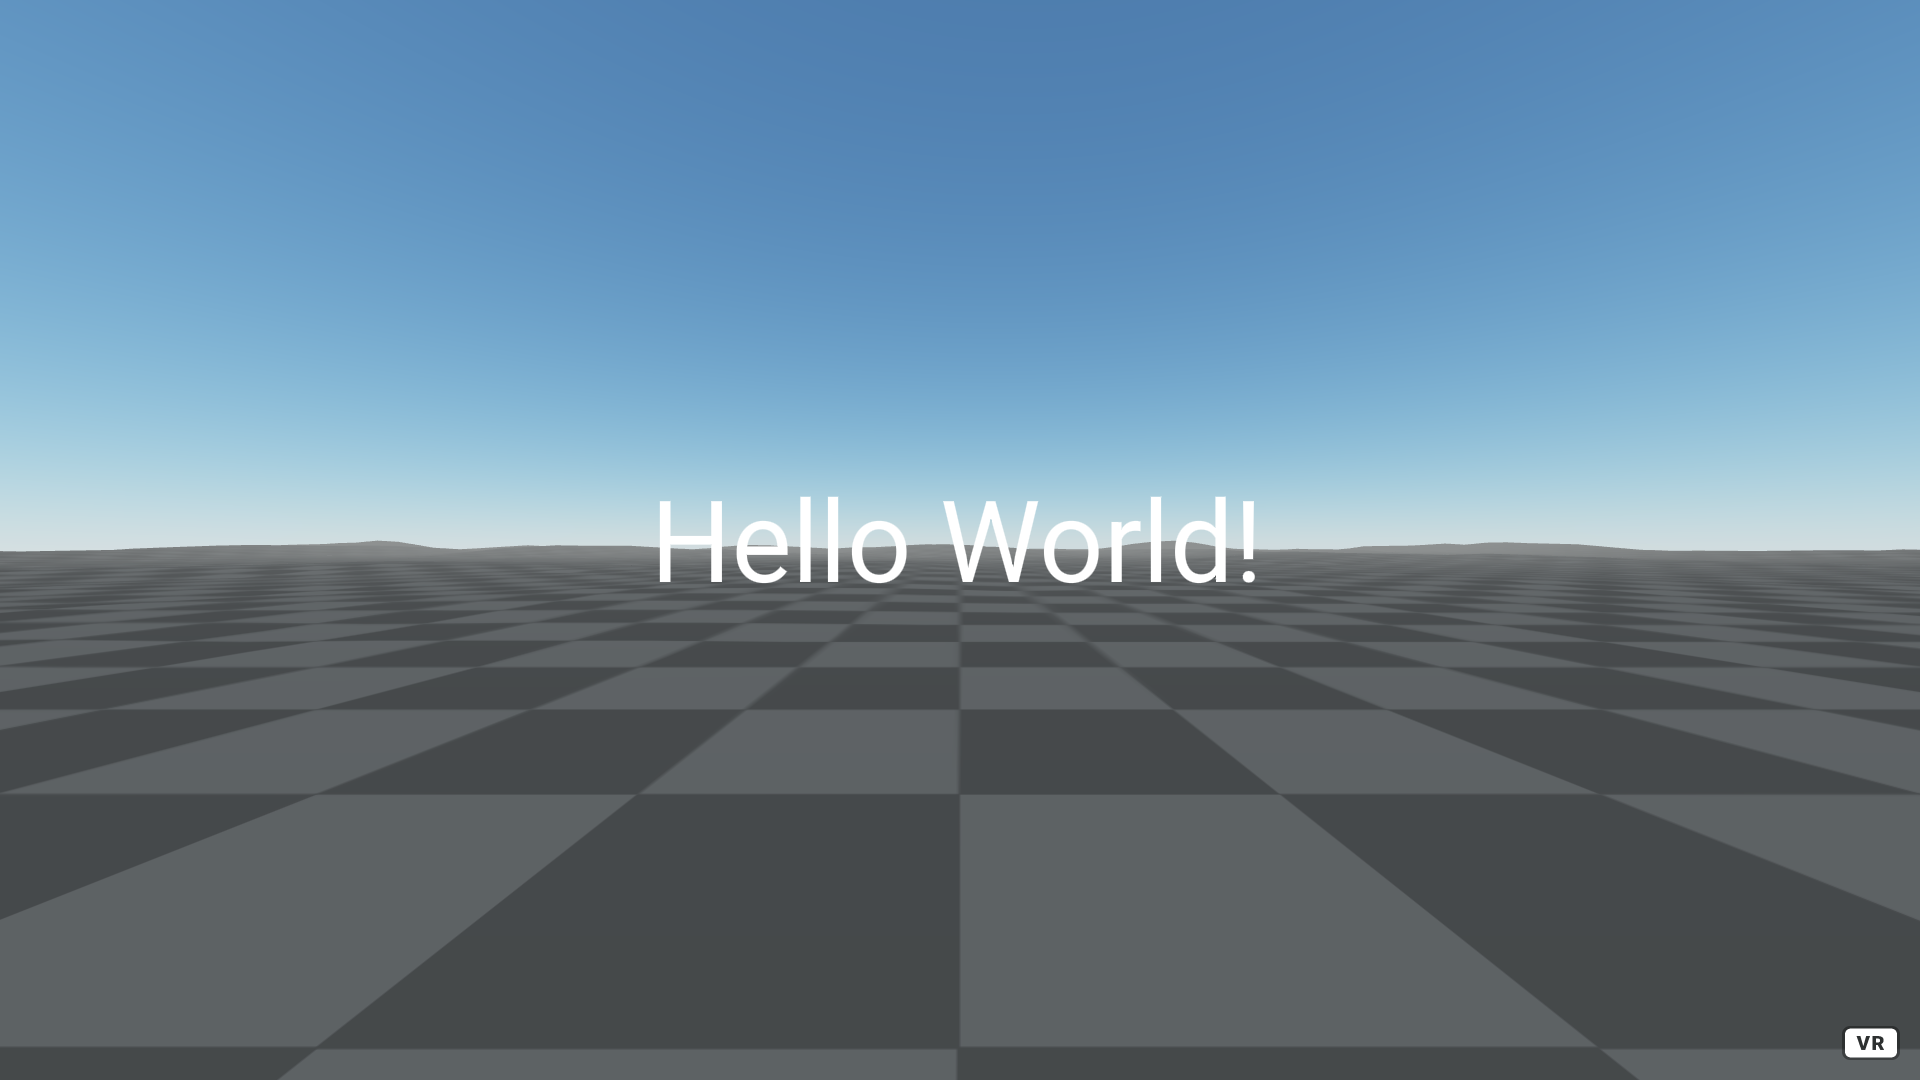
Your page should now look like this:
Feel free to adjust the environment preset to your liking. You can see a demo page with all of the available presets here.
The last thing we’ll do with our A-Frame scene for now is to add some text to the scene. This will eventually display our wallet address/ENS name, but we’ll just set it to say “Hello World!” for now.
Add another <a-entity> with the following setup:
<!DOCTYPE html>
<html>
  <head>
    <script src="https://aframe.io/releases/1.2.0/aframe.min.js"></script>
    <script src="https://unpkg.com/aframe-environment-component@1.2.0/dist/aframe-environment-component.min.js"></script>
    <title>Hello Web3XR</title>
  </head>
  <body>
    <a-scene>
      <a-entity environment="preset: default"></a-entity>
      <a-entity
      text="value: Hello World!"
      position="1.5 1.6 -1"
      scale="4 4 4"></a-entity>
    </a-scene>
  </body>
</html>
This new <a-entity> adds the text component, positions it to be a meter away while roughly in front of us at eye level, and scales it up by 4.
Your scene should now look like this:
With most of the pieces of our A-Frame scene set up, we can integrate ethers.js and start hooking the two together.
Integrating ethers.js
To use ethers.js, we can just import it through a script tag like so:
<head>
  <script src="https://aframe.io/releases/1.2.0/aframe.min.js"></script>
  <script src="https://unpkg.com/aframe-environment-component@1.2.0/dist/aframe-environment-component.min.js"></script>
  <script src="https://cdnjs.cloudflare.com/ajax/libs/ethers/5.1.4/ethers.umd.min.js"></script>
  <title>Hello Web3XR</title>
</head>
Once we have it imported, we’ll need to create a custom A-Frame component that will call functions from ethers.js. Create a new JavaScript file in your project folder (for this tutorial it will just be called main.js).
Inside your JavaScript file, add the following code:
AFRAME.registerComponent('wallet', {
  init: function() {
    this.text = this.el.getAttribute('text');
    this.getWallet();
  },
  getWallet: async function() {
    const provider = new ethers.providers.Web3Provider(window.ethereum);
    await provider.send("eth_requestAccounts", []);
    const accounts = await provider.listAccounts();
    const walletAddress = accounts[0];
    const name = await provider.lookupAddress(walletAddress) || walletAddress;
    this.el.setAttribute('text', { value: `Hello ${name}!` });
  }
});
To break this code down:
AFRAME.registerComponent('wallet', {
This tells A-Frame we are registering a new component, in this case called ‘wallet’.
init: function() {
  this.getWallet();
},
The init function is called at the beginning of the component lifecycle and is typically where various setup tasks happen. In our case, we are just calling a custom function of ours, getWallet(), which will handle all the logic from ethers.js.
getWallet: async function() {
We mark getWallet as an async function to be able to use the await keyword and minimize callbacks. The function being async is also why we need to call it separately from our init function, as opposed to just putting all the logic there instead.
const provider = new ethers.providers.Web3Provider(window.ethereum);
We first create a new provider to use with ethers.js. MetaMask injects this as an object in the window, which we use here.
await provider.send("eth_requestAccounts", []);
const accounts = await provider.listAccounts();
const walletAddress = accounts[0];
This is what will get MetaMask to prompt you to connect to the page. Once you do, it pulls your wallet address into an array, after which we extract it into a separate variable.
const name = await provider.lookupAddress(walletAddress) || walletAddress;
This checks whether your wallet address has an ENS name associated with it. If so, the variable is set to that ENS name, otherwise it remains as the regular wallet address.
this.el.setAttribute('text', { value: `Hello ${name}!` });
Finally, we get a reference to the text component on our same element, and change the value so that the text changes “World” to be our name variable, which will either be an ENS domain or a wallet address.
With all of our component logic written, all that remains is to add this new component to our A-Frame scene.
Connecting Everything Together
In our index.html, import our script and attach the new wallet component like so:
<!DOCTYPE html>
<html>
  <head>
    <script src="https://aframe.io/releases/1.2.0/aframe.min.js"></script>
    <script src="https://unpkg.com/aframe-environment-component@1.2.0/dist/aframe-environment-component.min.js"></script>
    <script src="https://cdnjs.cloudflare.com/ajax/libs/ethers/5.1.4/ethers.umd.min.js"></script>
    <script src="main.js"></script>
    <title>Hello Web3XR</title>
  </head>
  <body>
    <a-scene>
      <a-entity environment="preset: default"></a-entity>
      <a-entity
      text="value: Hello World!"
      position="1.5 1.6 -1"
      scale="4 4 4"
      wallet></a-entity>
    </a-scene>
  </body>
</html>
Once you reload the page, you should be prompted to connect your wallet, after which your wallet address/ENS name should now be displayed.
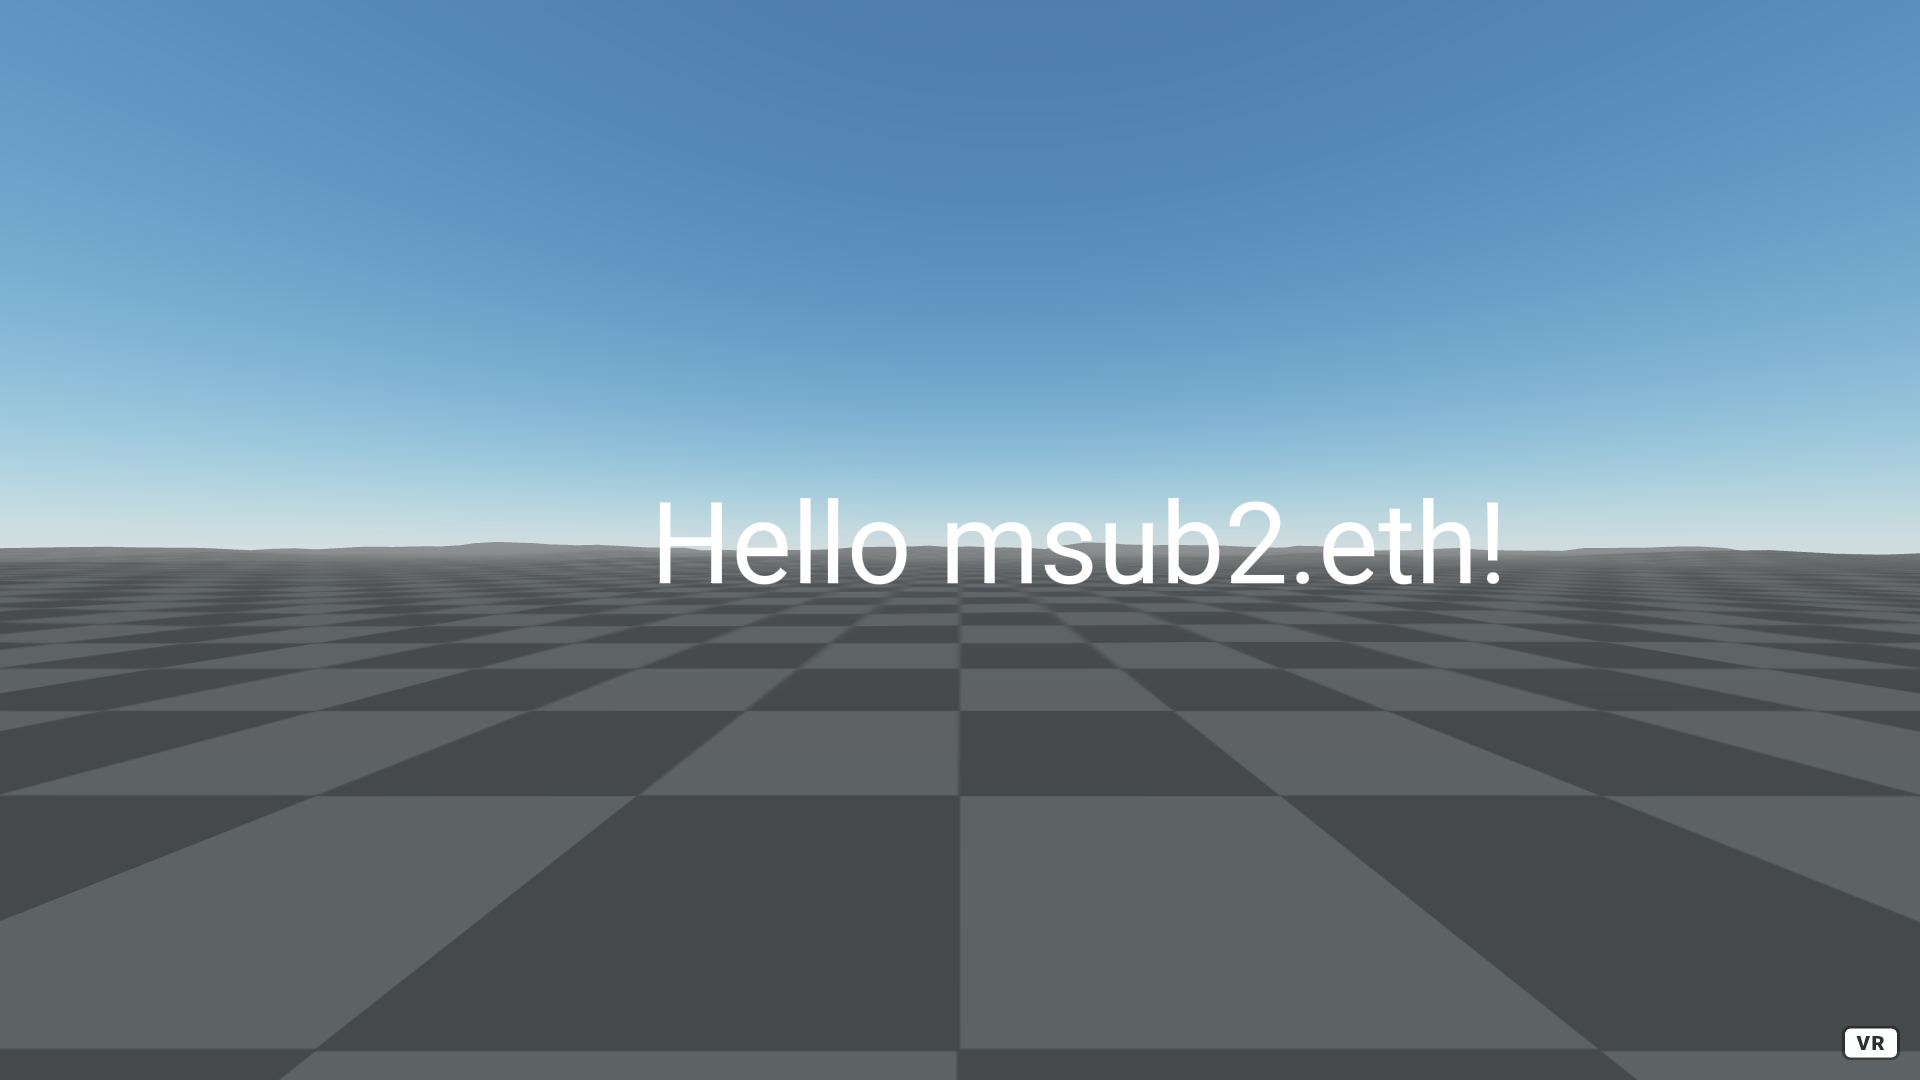
Congratulations! You’ve now made your first Web3XR experience. You can publish this to a personal website or a service like GitHub Pages and share it with others, and if they have a VR headset connected to their PC they’ll be able to enter the scene immersively as well. If you’d like to tinker around some more with this project, here are some suggestions:
- If you’re new to WebXR, try exploring what other components you can add to the scene (you can check the full A-Frame docs here) and writing other custom components.
- If you’re new to Web3, try exploring what other information you can pull and display using ethers.js (you can check the full ethers.js docs here). You could also use a different library and connect a wallet from a different blockchain entirely, like Tezos.